Old School Tool Care Trick That Keeps Blades Sharp and Tools Working Longer
A pruner that sticks halfway through a stem makes every garden job feel harder than it needs to be. The blade drags, the pivot squeaks, sap builds up, and before long the tool you liked becomes the tool you avoid.
Here’s the old-school fix that still earns its keep: a bucket filled with sand and oil.

Sharpening restores the edge. Maintenance preserves it. That’s the difference. A sharp blade cuts cleanly, but a clean, lightly oiled blade stays useful longer, especially in humid places where rust shows up fast. If you garden near the coast or anywhere warm and damp, like much of Central Florida, this little bucket can save a lot of aggravation.

Why the sand and oil bucket works
The idea is simple. Sand acts like a gentle scrubber. Oil leaves behind a thin protective film.
When you push a blade-first tool into the bucket a few times, the sand helps rub off dirt, plant sap, and light surface grime. The oil coats the metal and works into moving parts like pivots and hinges. That helps reduce friction and slows rust.
This isn’t a replacement for sharpening. If your pruners are dull, nicked, or crushing stems instead of slicing them, they need a proper edge. But once they’re sharp, regular care keeps them that way longer.
Clean cuts matter in the garden. Ragged cuts on stems can leave more damaged tissue behind, which takes longer for the plant to seal over. That’s why extension services and experienced gardeners keep repeating the same basic advice: keep cutting tools clean, sharp, and dry.
The bucket trick makes that advice easy enough to actually follow.
How to make the bucket
You don’t need anything fancy. A small bucket, a bag of clean sand, and the right oil will do it.
Use:
A sturdy 1-gallon to 5-gallon bucket
Clean play sand or builder’s sand
Mineral oil or boiled linseed oil
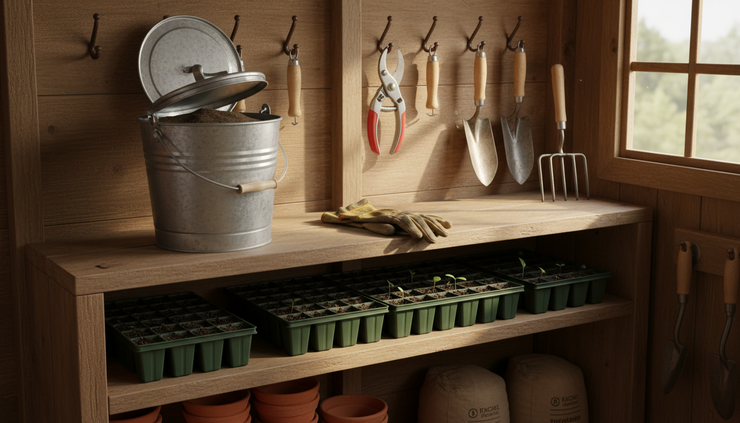
A lid, if the bucket will live outside or in a dusty shed
Fill the bucket about three-quarters full with sand. Then pour in enough oil to dampen the sand, not flood it. You’re aiming for the feel of slightly wet beach sand. It should clump a little when stirred, but oil shouldn’t be pooling on top.
Do not use used motor oil. Plenty of people used to do it, and it did coat metal, but it’s a bad idea around soil, plants, pets, and people. Used motor oil can contain contaminants you don’t want anywhere near a vegetable bed or potting bench.
Mineral oil is a clean, simple choice. Boiled linseed oil also works, but treat it with respect. Rags soaked with linseed oil can heat up as they dry and may catch fire if wadded up. If you use rags during tool care, lay them flat outdoors to dry completely or dispose of them in a sealed metal container according to the label.

How to use it without overthinking it
After pruning, digging, weeding, or cutting twine and stems, knock off heavy dirt first. A quick tap on the ground or a wipe with a rag is enough.
Then push the metal end of the tool into the sand several times. For pruners, hedge shears, snips, and knives, go blade first. Open and close pivoting tools a few times while the metal is lightly coated so the oil can work into the joint.
This works especially well for:
Hand pruners
Loppers
Hedge shears
Garden knives
Trowels
Weeders
Small hoes
Cultivators
Don’t bury wooden handles in oily sand. A little oil on a wood handle isn’t the end of the world, but this bucket is mainly for metal parts. If the handles need care, wipe them separately with an appropriate wood oil and sand down splinters when needed.
For sticky sap, the bucket helps, but it may not do the whole job. Pine, fig, and some ornamental shrubs can leave stubborn residue. In that case, wipe the blade first with a cloth and a small amount of rubbing alcohol or a citrus-based cleaner, then use the bucket.
Also, if you’ve been cutting diseased plant material, clean and disinfect the tool before putting it into the bucket. The sand bucket is for maintenance, not sterilizing. A common home-garden approach is to clean off debris first, then use a disinfectant according to the product label. Dry the tool before oiling.

What it does for your tools over time
The biggest win is consistency. Most tools don’t fail all at once. They get neglected a little at a time.
A bit of sap stays on the blade. Then soil sticks to the sap. Then moisture sits against the metal. The pivot gets dry. The spring gets gritty. The blade starts dragging instead of slicing.
The sand-and-oil bucket interrupts that cycle.
It helps with preserving tools because it handles three small jobs at once:
It scrubs away light debris
It leaves a thin rust-resistant coating
It keeps moving parts from drying out
That matters for everyday gardening tools, especially the ones used every week. A pair of bypass pruners that gets pushed into the bucket after each use will usually feel smoother than one tossed into a drawer with sap still drying on the blade.
It can also make sharpening less frustrating. Clean metal is easier to inspect. You can see nicks, rust, and worn bevels instead of guessing under a layer of grime.
Still, don’t ask the bucket to do everything. It won’t fix a bent blade. It won’t grind a new bevel. It won’t remove deep rust. Think of it like brushing your teeth. It’s daily care, not dental surgery.
A few smart habits make it work better
Keep the bucket where you’ll actually use it. A perfect setup in the back corner of the garage won’t help much if your pruners live by the back door.
A potting bench, shed entrance, or covered patio shelf works better. If rain can reach it, use a lid. Water in the bucket defeats the purpose and can turn the sand into a rusty mess.
Refresh it when it gets dirty. If the sand starts smelling bad, looking muddy, or clumping with plant gunk, dump it responsibly and make a new batch. For light home use, that may not be often, but the bucket shouldn’t become a compost pile for sap and soil.
Label it if kids or guests might be around. It’s not dangerous when used sensibly, but it’s still an oil bucket with sharp tools going in blade first. Store it out of reach of children and pets.
Keep the edge, save the effort
This trick has lasted because it solves a real problem without making tool care complicated. Fill a bucket with sand, add mineral oil or boiled linseed oil, and use it after garden work. That’s it.
Sharpen when the edge is dull. Clean and disinfect when disease is a concern. Then use the bucket to keep metal parts clean, lightly oiled, and ready for the next round.
Keep your tools sharp, keep your work smart, and gardening gets a whole lot easier.


Comments